Nautical Paper Fish Wedding Decor
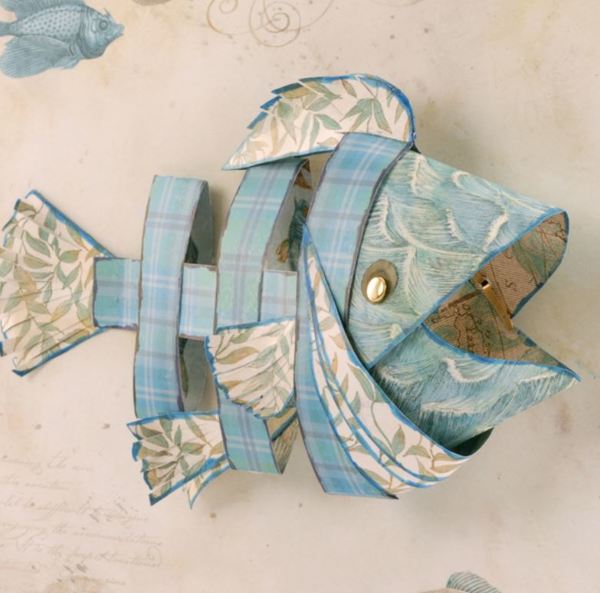
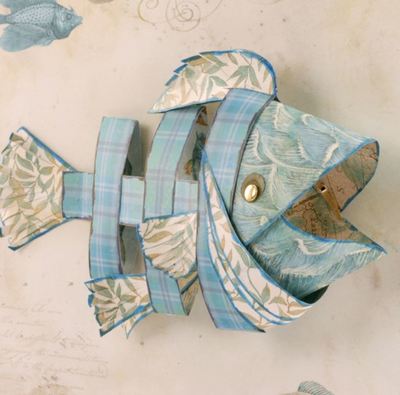
Paper decor for weddings can be so fun to make, but do you ever find yourself at a loss of what to fold and glue next? If you're holding a nautical wedding, you should consider this Nautical Paper Fish Wedding Decor to hang up at your reception. Unlike less savory fish-related decorations, there are no nasty hooks in its mouth or nets around its fins. This cute fish is just swimming along the wall of your reception, adding some serious style to your party. Make a few in different colors for a really fun effect!
Estimated Cost$31+
Time to CompleteIn an evening
Primary TechniquePaper Crafts

Project TypeWedding Decor
Materials List
- K&Company Tim Coffey Travel Mat Pad
- K&Company Tim Coffey 12x12 Travel Specialty Paper Pad
- EK Tools Straight Edge Trimmer
- EK Tools Cutter Bee Scissors
- EK Tools 15 Inch Centering Ruler Pro
- EK Tools Carnival Lights Writers 8 pc Set
- Permanent glue stick
- Paper clips
- Pencil
- 12"x12" Illustration board
- Paper fasteners
Instructions
-
Use the centering ruler and pencil to mark the blue plaid paper. Use a scissors to cut the following sizes: (2) 1" x 6", (1) 1"x8", (1) 1"x10", and (1) 1"x12"
-
Use the large end of the Pure Violet Zig Writer to color a faux deckle edge on each edge of the plaid paper strips.
-
Mark 1" from each end of the 8", 10", and 12" strips. Form a paper loop with the plaid to the outside, overlapping the one inch marks. Glue in place, securing the glued areas with paper clips. When dry, lightly press each loop in half forming a slight crease on the top and bottom area of each end. These 3 "flattened" loops will form the body of the fish. Use the centering ruler to mark the center side of each loop. From smallest to largest, lay the loops 1 inch apart, aligning the center marks. Slip the 6" strip in the center of all 3 loops and glue in place. Repeat on opposite side.
-
Print and cut out the pattern pieces. cut the upper face and lower jaw from the Blue Wave paper. Cut two eyes from the Olive paper. Add a pupil to each eye using the Pure Violet Writer. Glue the eye in position on the upper face. When set, place a paper fastener in the center of each pupil and secure.
-
Make a double-sided paper by gluing two sheets of the blue vine/beige background paper back to back using a glue stick. Cut the gills; upper, side, and lower fins and tail from this paper. Use the large end of the Blue Jay Zig Writer to color a faux deckle edge on each edge of the gills, fins, tail and face pieces.
-
Gently bend the upper face (blue wave pattern to the outside) centering the top middle within the top middle of the large front loop. Glue in place and secure with paper clips until set. when set, fit the lower jaw into the opening in the same manner. Glue in place and secure with paper clips.
-
Position one point of a gill 1/2" above the top of the center strip. Glue and secure with a paper clip. Wrap the gill to the opposite side. Glue and secure in the same manner. Place the remaining gills on the fish in the same manner, overlapping each strip approximately 1/2".
-
Use the scissors to cut slashes into the fins and tails following the dotted lines as indicated on the pattern. Lightly shape the fins by bending them carefully, curling the "fringe" gently back and forth around your finger.
-
Tuck the tail between the open ends of the center body strip. Glue and secure in place. This will close the end of the fish giving it a more dimensional shape.
-
Tuck the side fins between the front and center strips. Glue and secure. When dry, curl the fins outward.
-
Tuck a lower fin inside the lower fold of the center strip. Glue and secure.
Read NextDip Dyed Photo Backdrop

