How to Make Ear Muffs for a Wedding
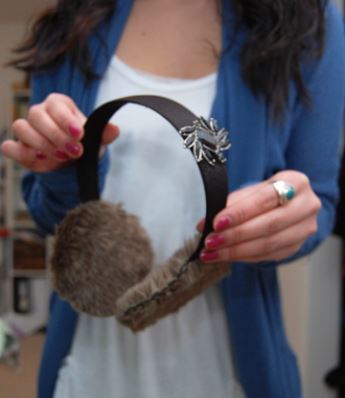
If you want to take outdoor photographs for your winter wedding, and of course you do, you have to make sure that the bridal party doesn't freeze. Keep everyone warm and uniform by giving the bridesmaids homemade gifts that they can wear on the big day. Learn How to Make Ear Muffs for a Wedding with this simple tutorial, and make a pair for each of your female attendants. They are more than formal enough to complement the rest of everyone's ensembles, and they'll make for some absolutely adorable and cuddly photos. Choose headbands that coordinate with your wedding colors, and you'll have happy and comfortable bridesmaids ready for outdoor photos.
Estimated Cost$11-$20
Time to CompleteIn an evening
Primary TechniqueSewing

SeasonWinter
Materials:
- Headband
- Faux fur fabric -at least a 25x25 inch piece
- Vintage brooch (optional)
- Not shown: Hot glue gun, jewelry pliers, scissors, sewing needle, thread
Instructions:
1.) Cut out 2 circles. Mine were 3 1/2" wide. It might help to make a cardboard template for your circles before cutting the faux fur.

2.) Hot glue the back of one circle to the backside of one end of the headband. I made mine so that an inch of the headband was glued to the circle. (Tip: Before glueing anything down, try on the headband-fur combination to figure out proper/comfortable placement)

3.) Attach the other circle, back side facing the other back side, with a little bit of hot glue.

4.) Whip stitch around the edge. Repeat 1-4 on the other side.

5.) Pry off the pin back on the booch with jewelry pliers, and then hot glue onto the headband.

Read NextSpring Blooms Crochet Shawl Pattern

